![owl-Logo-1.png]](https://help.lendingwise.com/hs-fs/hubfs/owl-Logo-1.png?width=43&height=46&name=owl-Logo-1.png)
On your branch, you can customize the web forms if you know a little CSS. For example, you can use this code:
To change the color fields of mandatory fields
<style>
.mandatory {
background-color: #bee4bf !important;
}
</style>
To hide your logo:
<style>
.navbar-brand {
display:none;
}
</style>
-----------------------------------------------------------------------------
Another example to hide logo plus make headers green with white text:
<style>
.navbar-brand {
display:none;
}
.card-header {
background-color: #2EB54B !important;
}
.card-label {
color: white !important;
}
</style>
Here is the outcome: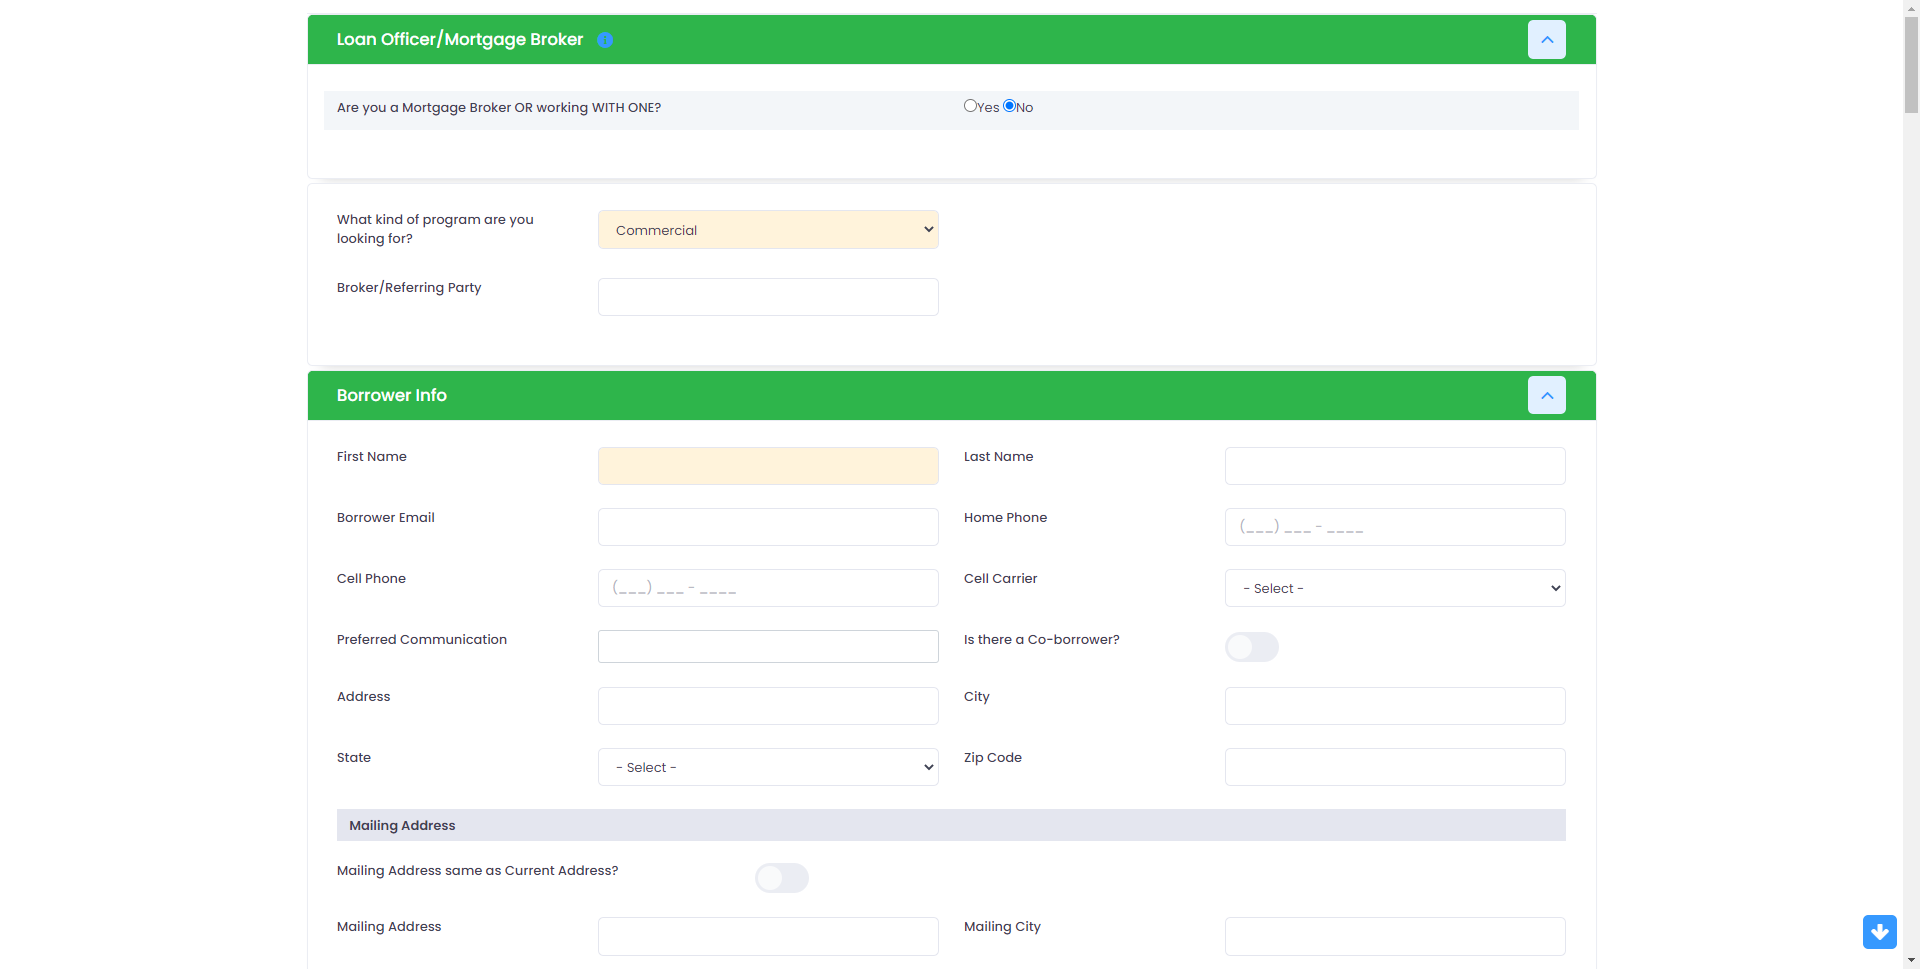
-----------------------------------------------------------------------------
<style> .btn.btn-primary {    color: #fff;    background-color: #3699ff;    border-color: #3699ff; }
</style>
-----------------------------------------------------------------------------
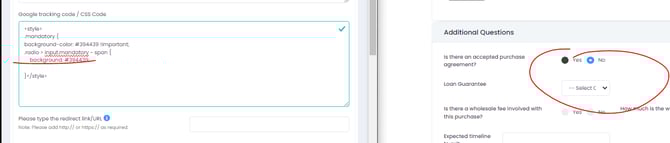
Another example for checkboxes/radio buttons:
<style>
.mandatory {
background-color: #394439 !important;
.radio > input.mandatory ~ span {
background: #394439;
}</style>
-----------------------------------------------------------------------------
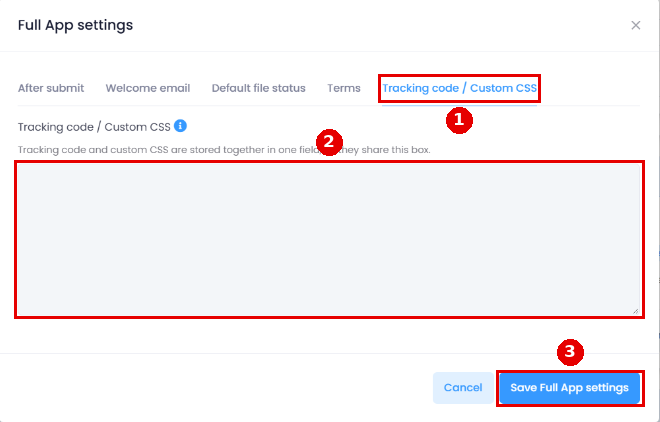
To do this, go to CRM > Branch > Branch List, click the branch, open the Web Form Integration tab, click the gear icon on the form's card, open the Tracking code / Custom CSS tab, paste the CSS and click the save button. Each form has its own box
Note:
The Tracking code / Custom CSS box only supports custom CSS: script tags (like Facebook Pixel or Google Analytics) are blocked by our security firewall to protect against XSS attacks. This is by design and can't be changed.