Workflows in the Platform
Workflows play a critical role in managing loan files and keeping your processes streamlined and organized. With various types of workflows and customizable steps, you can optimize your loan management process to match your unique needs. This article will provide a detailed guide on creating, editing, and optimizing workflows in the platform, as well as incorporating conditional logic and automation triggers.
Setting Up, Creating, and Editing Workflows:
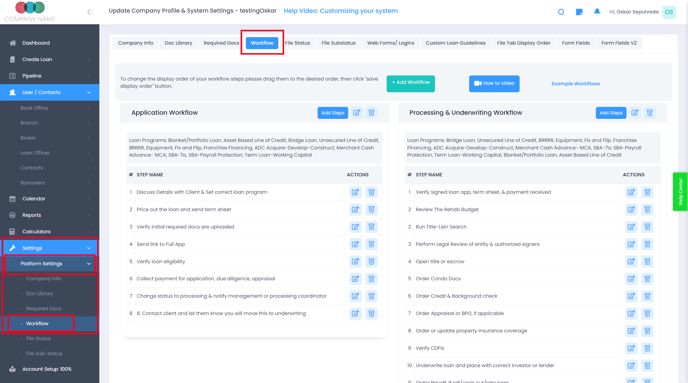
- Access workflows and workflow steps by navigating to Settings > Platform Settings > Workflow.
- Create various types of workflows, such as application, processing, underwriting, closing, post-closing, and loss mitigation.
- Avoid creating steps like "Upload XYZ document." This is better managed within the required documents module.
Customizing Workflow Steps:
- Enhance workflow steps by adding descriptions, clarifying expectations and guiding users on what is expected.
- Link workflows to specific loan programs.
- Control the visibility and editability of workflows for specific employees, branches, and LOs/Brokers in your Settings.
- Add unique workflow steps within a loan file to cater to that file's specific needs.
Conditional Logic and Automation Triggers:
- Implement conditional logic in workflow steps based on factors like loan programs, transaction types, property types, states, and credit score ranges, ensuring they are displayed only for relevant loan files.
- Set up automated triggers for workflow steps to initiate events such as tasks/reminders, emails, or webhooks, enhancing efficiency.
Tips for Workflow Optimization:
- Clearly describing each workflow step helps users efficiently complete their tasks.
- Customize default workflows or create new ones to suit your needs. You can create multiple workflows or just one master workflow for simplicity.
- Review and overwrite the Master Onboarding template workflows section to include your preferred workflows and steps. Add comments on workflow steps to indicate any automated rules for sending emails, creating tasks, or sending webhooks to various parties.
Additional Workflow Features:
- The platform comes with pre-built workflows and steps that can be edited or created as needed.
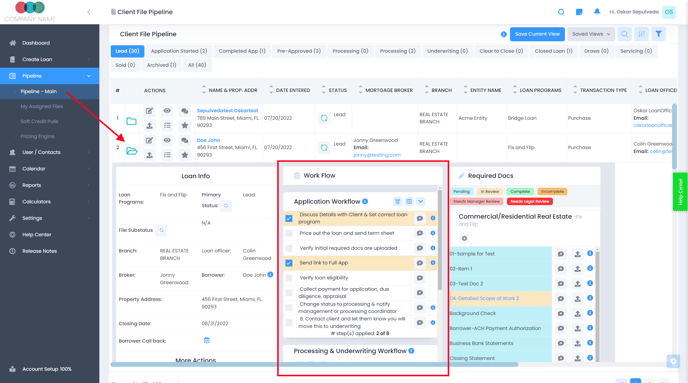
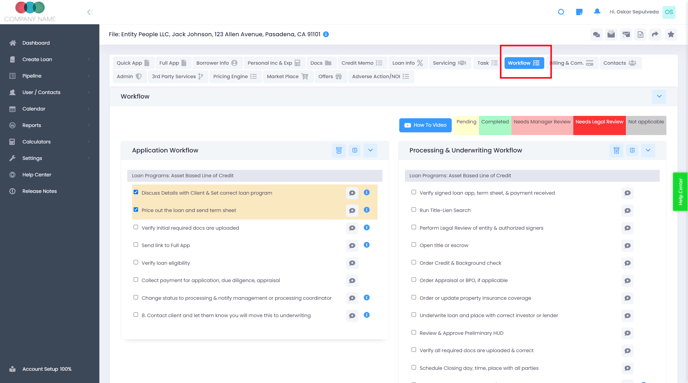
- Workflow steps are visible and editable from the Pipeline's quick view folder and in the Workflow tab inside a loan file.
Efficiently managing loan files becomes significantly easier with the mastery of workflows in the platform. By customizing workflows, implementing conditional logic, and utilizing automation triggers, your processes will be clearer, more concise, and tailored to your business needs. The platform's advanced features, such as the notes icon, 'i' icon, and '+' icon, help drive effective communication and collaboration among users while completing workflow tasks. Master workflows to maximize productivity and streamline your loan management process.