![owl-Logo-1.png]](https://help.lendingwise.com/hs-fs/hubfs/owl-Logo-1.png?width=43&height=46&name=owl-Logo-1.png)
Any back office user with "Allowed to mass update" turned on can deactivate files. (Without Manager permissions, Deactivate Files is the only Mass Update option they get.) Please be sure to enable the "Allowed to mass update" permission setting.
Go to CRM > Back Office Users > Back Office User List and click the user who needs this permission.
Note: Only users with the Manager role type can search for or view archived loans.
Then scroll down to the "Special Reports or Features" section and confirm the "Allowed to mass update" permission setting is toggled on as shown in the screenshot below: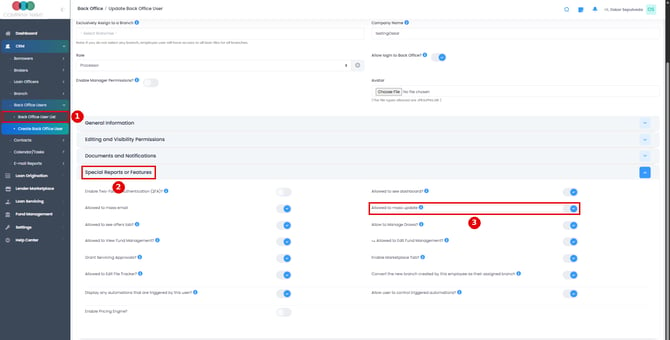
To Delete a Loan File, you need to:
- Log in to your LendingWise Back Office account.
- Go to Loan Origination > Pipeline - Main.
- Find the loan files you want to delete. Then scroll the grid all the way to the right. The second-to-last column has a box for each file and an ALL box at the top.
- Place checkmarks in the boxes for each of the loan files you would like to delete/deactivate.
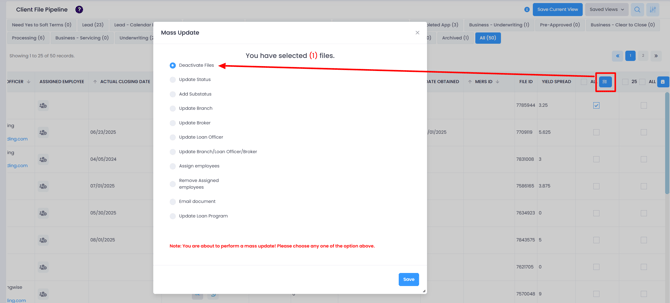
- Then click on the "Mass Update" button outlined in the screenshot below (blue button with a list icon).
- Select Deactivate Files.
- Click "Save". The loan files have now been deleted/deactivated and they will no longer show in your pipeline.
Here is a quick video tutorial.
Note: deactivating files with Mass Update runs any matching automation rules without asking.
To Reactivate a Deleted or Archived Loans, you need to:
- Log in to your LendingWise Back Office account.
- Go to Loan Origination > Pipeline - Main.
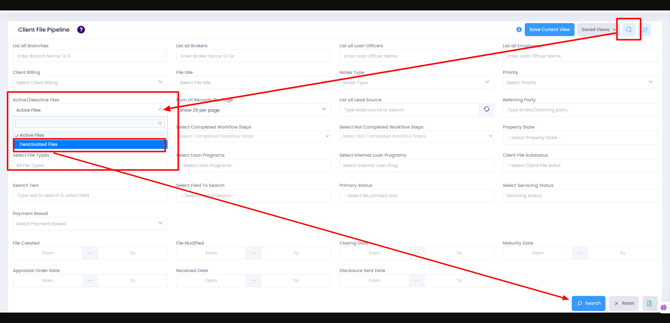
- Click the Search icon.
- Find the “Active/Deactivate Files” and select “Deactivated Files” from the dropdown list.
- Then click Search. This will show all the deactivated files in your pipeline.
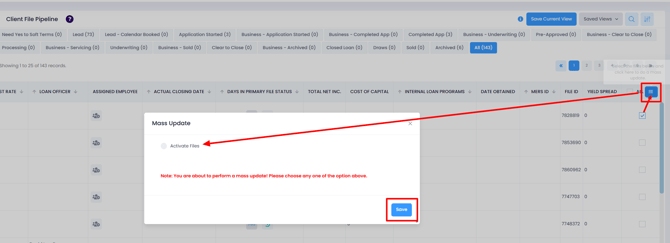
- To reactivate, click the icon in the Actions field.
- Then click Yes to confirm.
Here is also a quick video.