![owl-Logo-1.png]](https://help.lendingwise.com/hs-fs/hubfs/owl-Logo-1.png?width=43&height=46&name=owl-Logo-1.png)
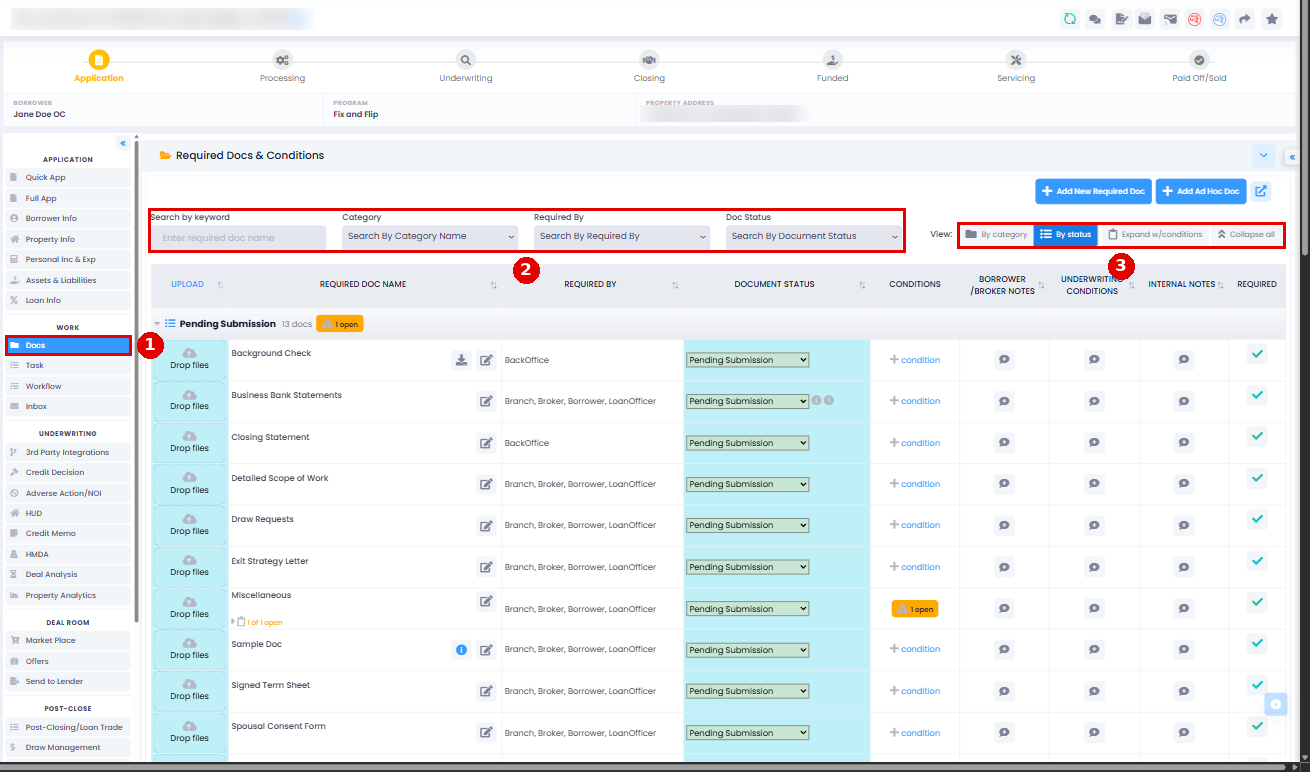
The Docs tab is where you collect, review and send a loan file's documents. Open the loan file and, in the menu on the left under WORK, click Docs.
Required Docs & Conditions
This list shows the documents required for this file. A required doc can hold several uploads, so you can use one like a folder (for example Entity Docs, Property Docs or Bank Statements).
- Upload: drop a file on a row. Its status moves from Pending Submission to Pending Review.
- Status and notes: each doc has a status and two note bubbles (BORROWER /BROKER NOTES and INTERNAL NOTES), so the borrower and your team can see where things stand.
- Find docs: use the filters (keyword, Category, Required By, Doc Status) and View By.
- Inbox attachments: if inbox syncing is on, emailed attachments show under Parsed Attachments from Inbound Emails, ready to file.
Add a required doc for this file only
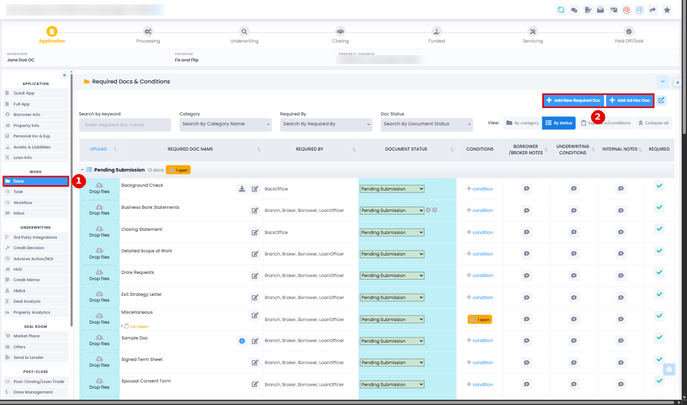
Not every file needs the same documents. Click + Add New Required Doc (or + Add Ad Hoc Doc) at the top of the Docs tab to add a doc to this file only. Borrowers or your team then upload to it like any other required doc. Use a doc's pencil icon to edit it for this file only (you can change the doc name, category, and required-by role).
Tips:
- Processors and underwriters can add or remove required docs on a file at any stage.
- Add a reference file to a required doc to help the borrower or broker, for example a rehab budget template or disclosure form they can download, fill in, sign and upload.
Remove a required doc from this file
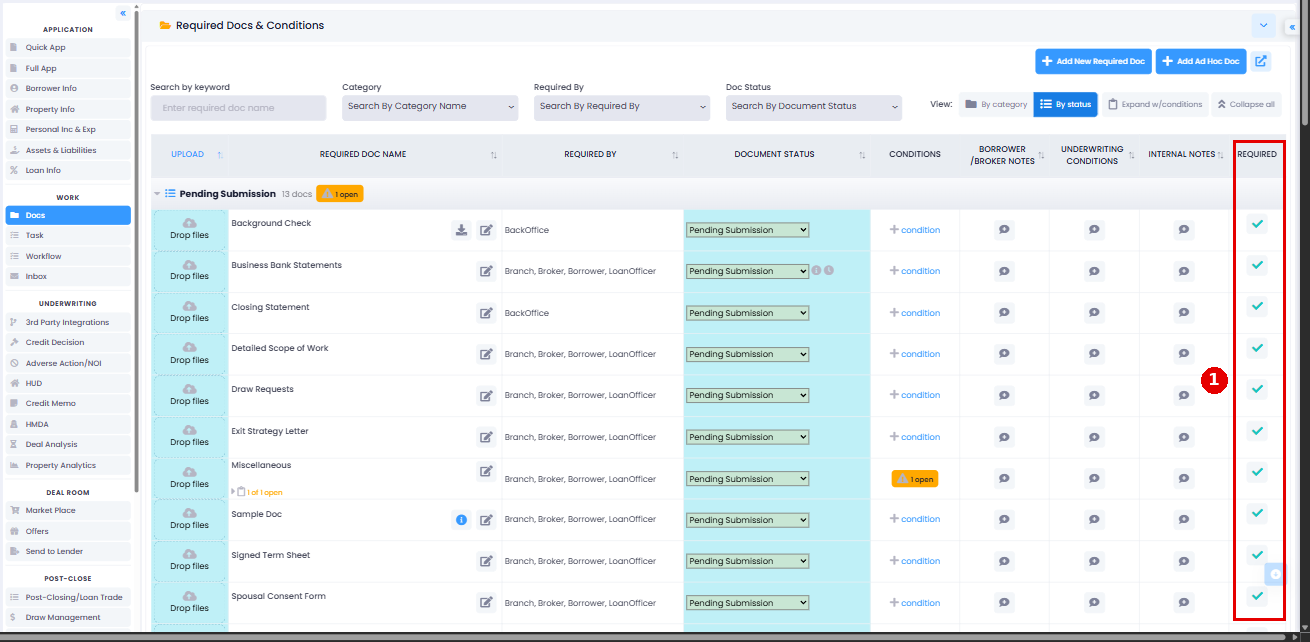
Click the doc's REQUIRED check (tooltip "Click To Disable The Document") to turn it off for this file only.


To remove a doc from every file, go to Settings > Platform Settings > Required Docs & Conditions. There's no on/off switch there: the trash icon deletes the doc, and the change shows on existing files right away. To stop a doc showing on some files without deleting it, change its display conditions instead.
Uploaded Files, Documents & Binders
This section lists every file uploaded to the loan file. A binder is a single PDF made by combining several documents, PDFs or images.
E-signed Documents lists documents sent for e-signature and their status. To send a document for signature, click the Open E-Sign Workspace icon in the loan file header.
Download documents as a ZIP
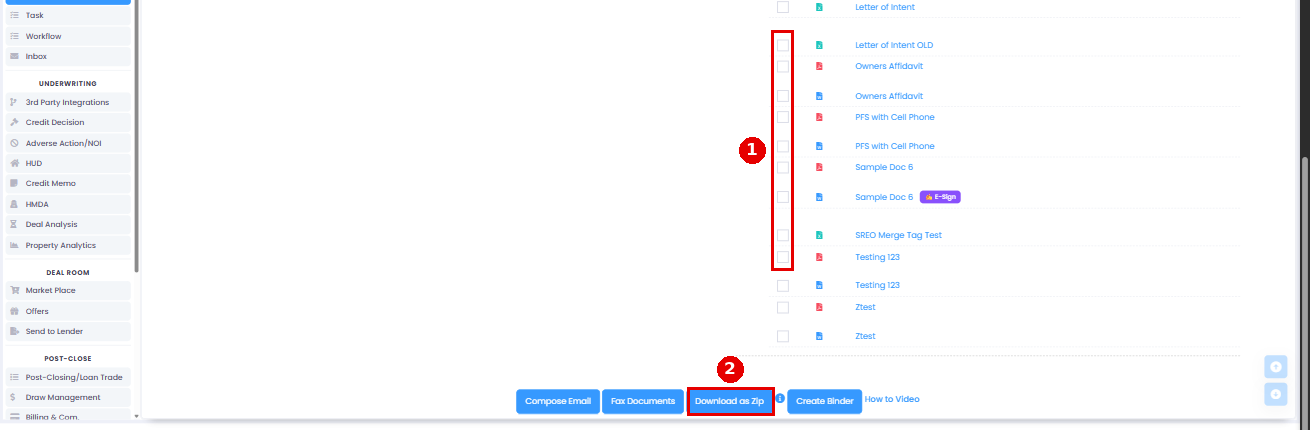
Select the documents you want under "Uploaded Files, Documents" and click Download as Zip. The ZIP usually lands in your Downloads folder.
- It includes Uploaded, Binder and eSign documents.
- There is a maximum file-size limit per download. If your selection exceeds this limit, download the documents in smaller batches.
- Linked files (such as Google Docs or other outside links) aren't included, since links can't be packed into a ZIP.
Video:
Auto-Generated Documents
These documents populate automatically from the loan data. Documents that support e-signatures (for example, the Loan Term Sheet) also display an E-Sign line; send those from Open E-Sign Workspace.
Click a document to see it and save the PDF if you need it outside LendingWise. You can also tick documents here (and in Uploaded Files above) and use the buttons below to email them, fax them or create a binder, a single PDF of the files you picked.
If you email documents, it's easy to select too many at once. If the combined size of the attachments exceeds the system limit, the system sends a link to the files instead of attaching them directly.
Your own document templates
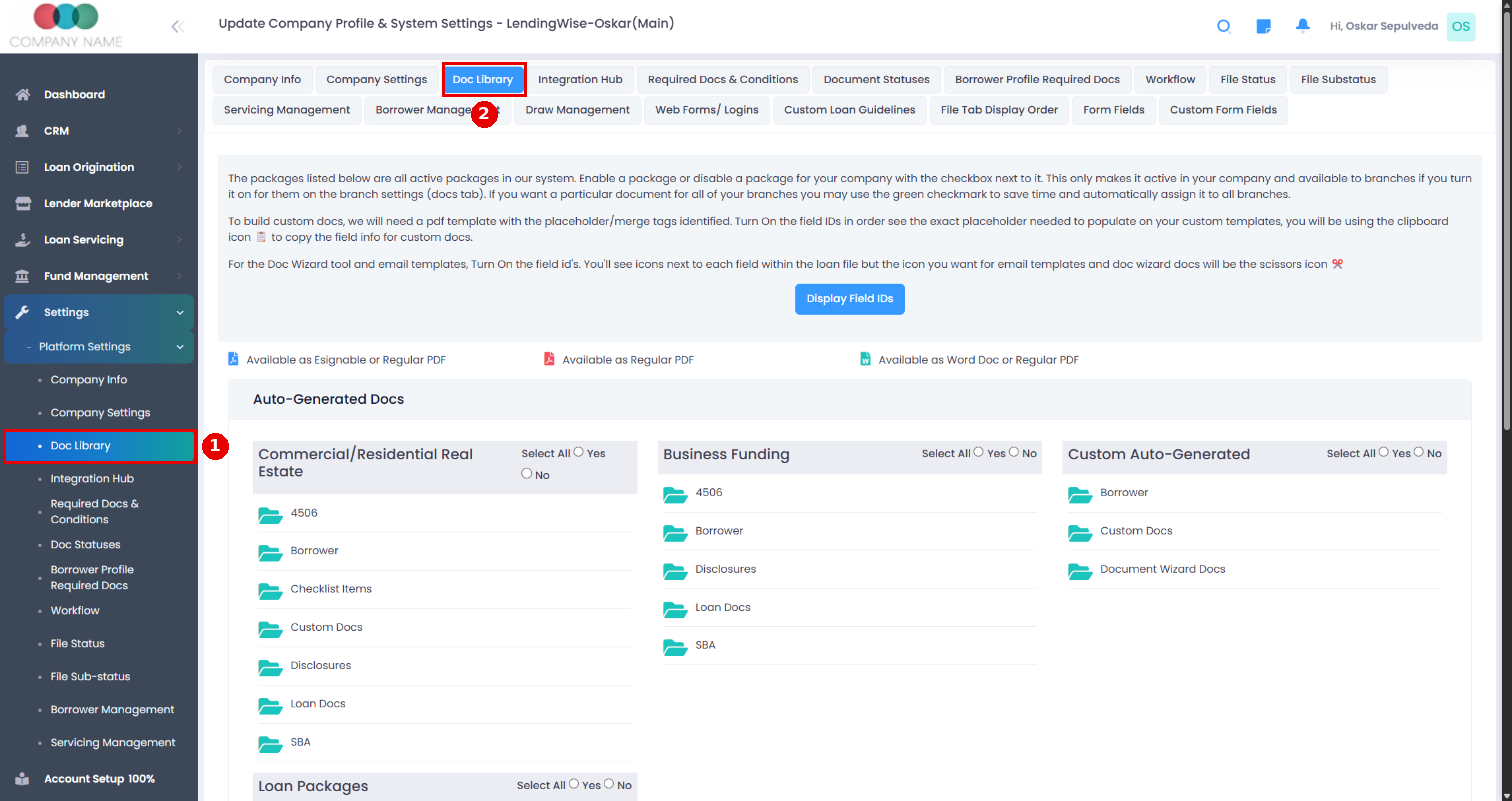
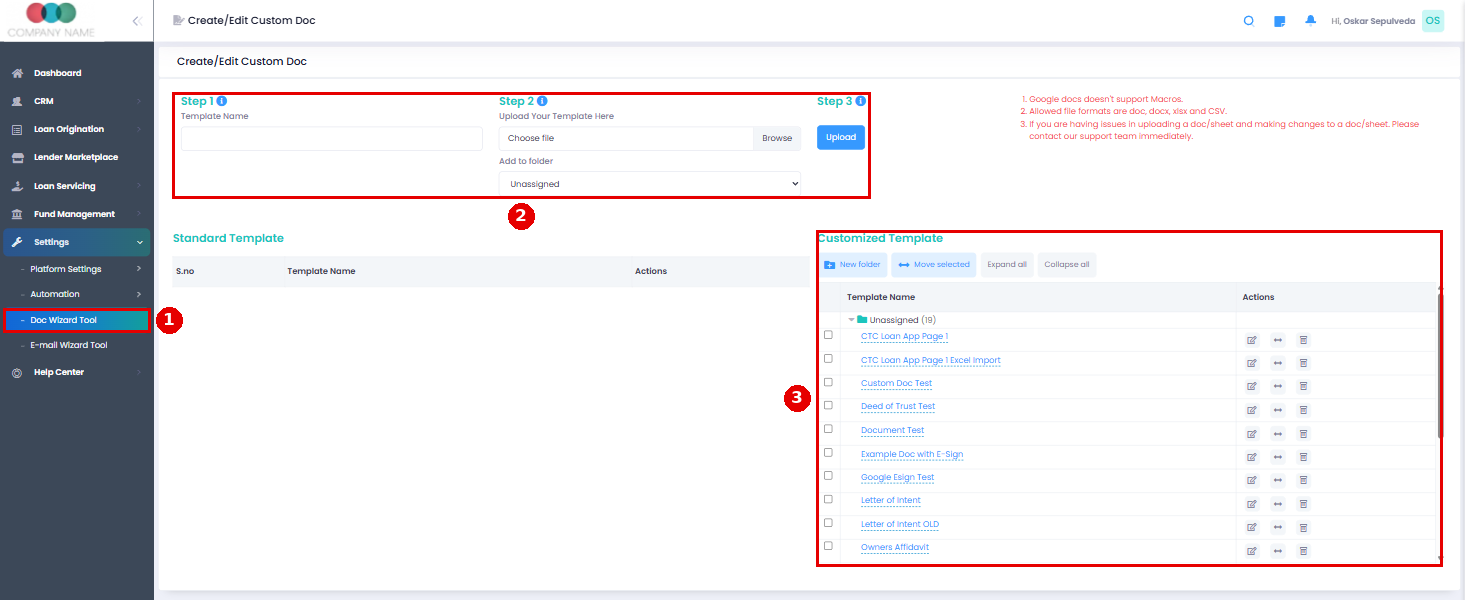
Document Wizard: create your own templates in Settings > Doc Wizard Tool. Upload a DOC, DOCX, CSV or XLSX file, add merge tags and edit it in the built-in editor. New templates start turned off for every branch, so turn each one on in CRM > Branch > Branch List > (branch) > Docs Library > Custom Auto-Generated > Document Wizard Docs, then click Save.
On the Docs tab, Doc Wizard templates show under Custom Auto-Generated > Document Wizard Docs, each listed twice (a red PDF line and a blue Word line). Templates with e-sign tags (like ##Esign Bor sig##) get a purple E-Sign badge and can be sent for signature from Open E-Sign Workspace > Doc Wizard.
Custom docs: we can also build custom documents for you that fill in loan data and can be e-signed. This is a paid service.