![owl-Logo-1.png]](https://help.lendingwise.com/hs-fs/hubfs/owl-Logo-1.png?width=43&height=46&name=owl-Logo-1.png)
Loan programs (also called services) are linked to many other features: required docs, workflows, Quick App and Full App form fields, and custom loan guidelines. Set them up first.
Turn on loan programs
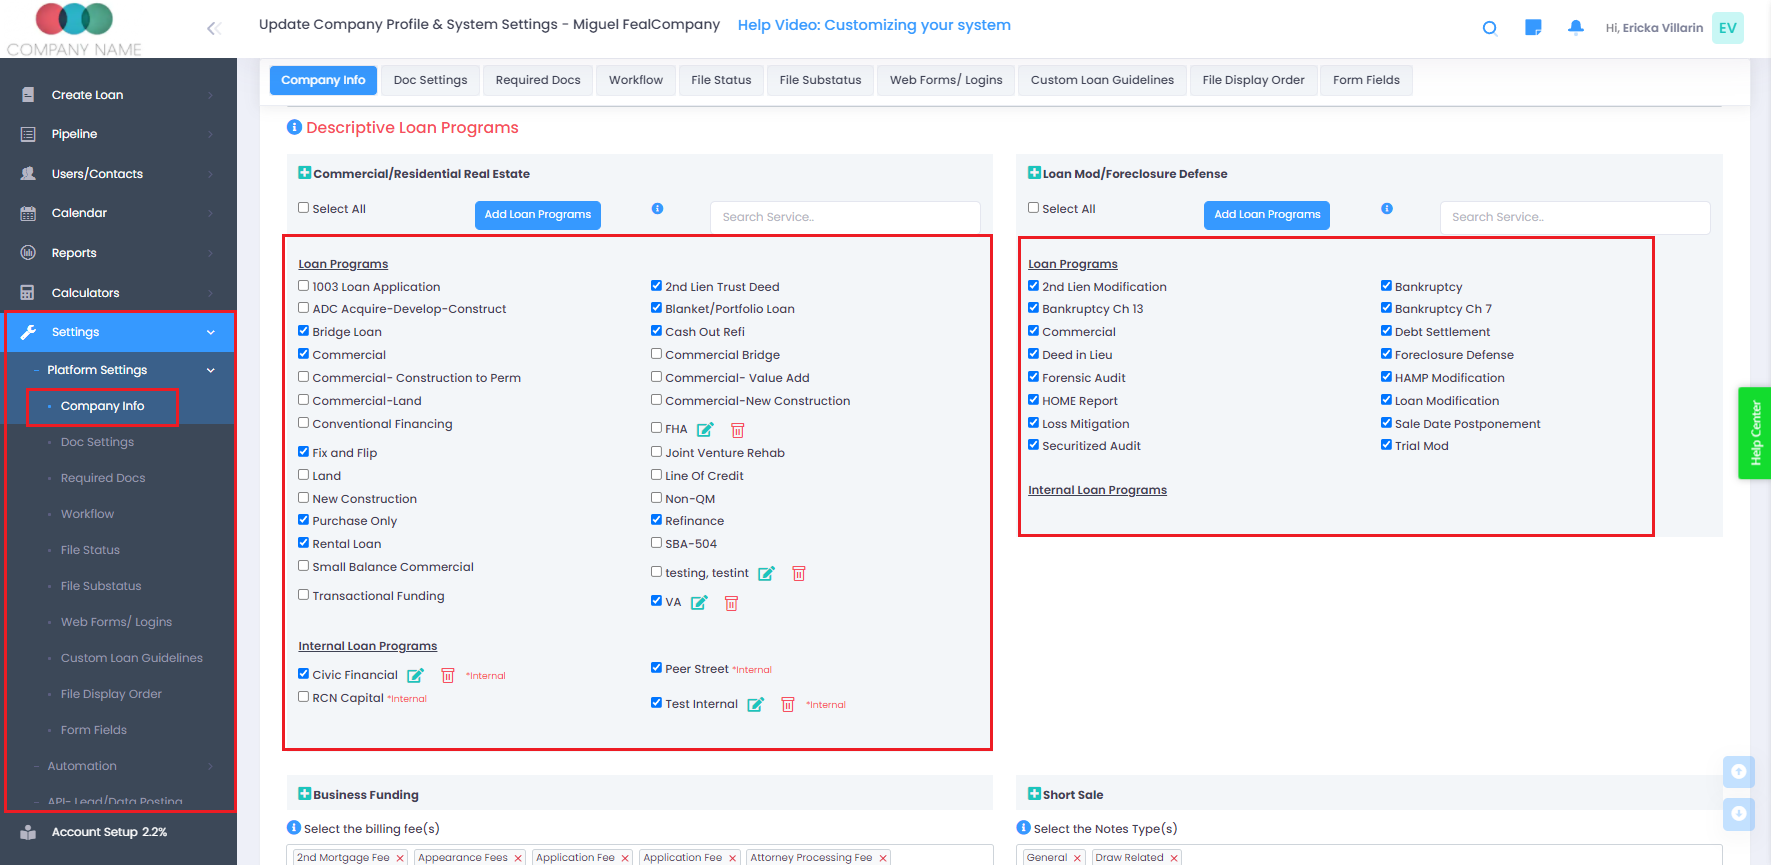
- Go to Settings > Platform Settings > Company Info and open Enable Loan Programs.
- Click the green + beside the file type.
- Tick the programs you want from the default list, or click Add Loan Programs to create your own.
- Click Save at the bottom of the page.
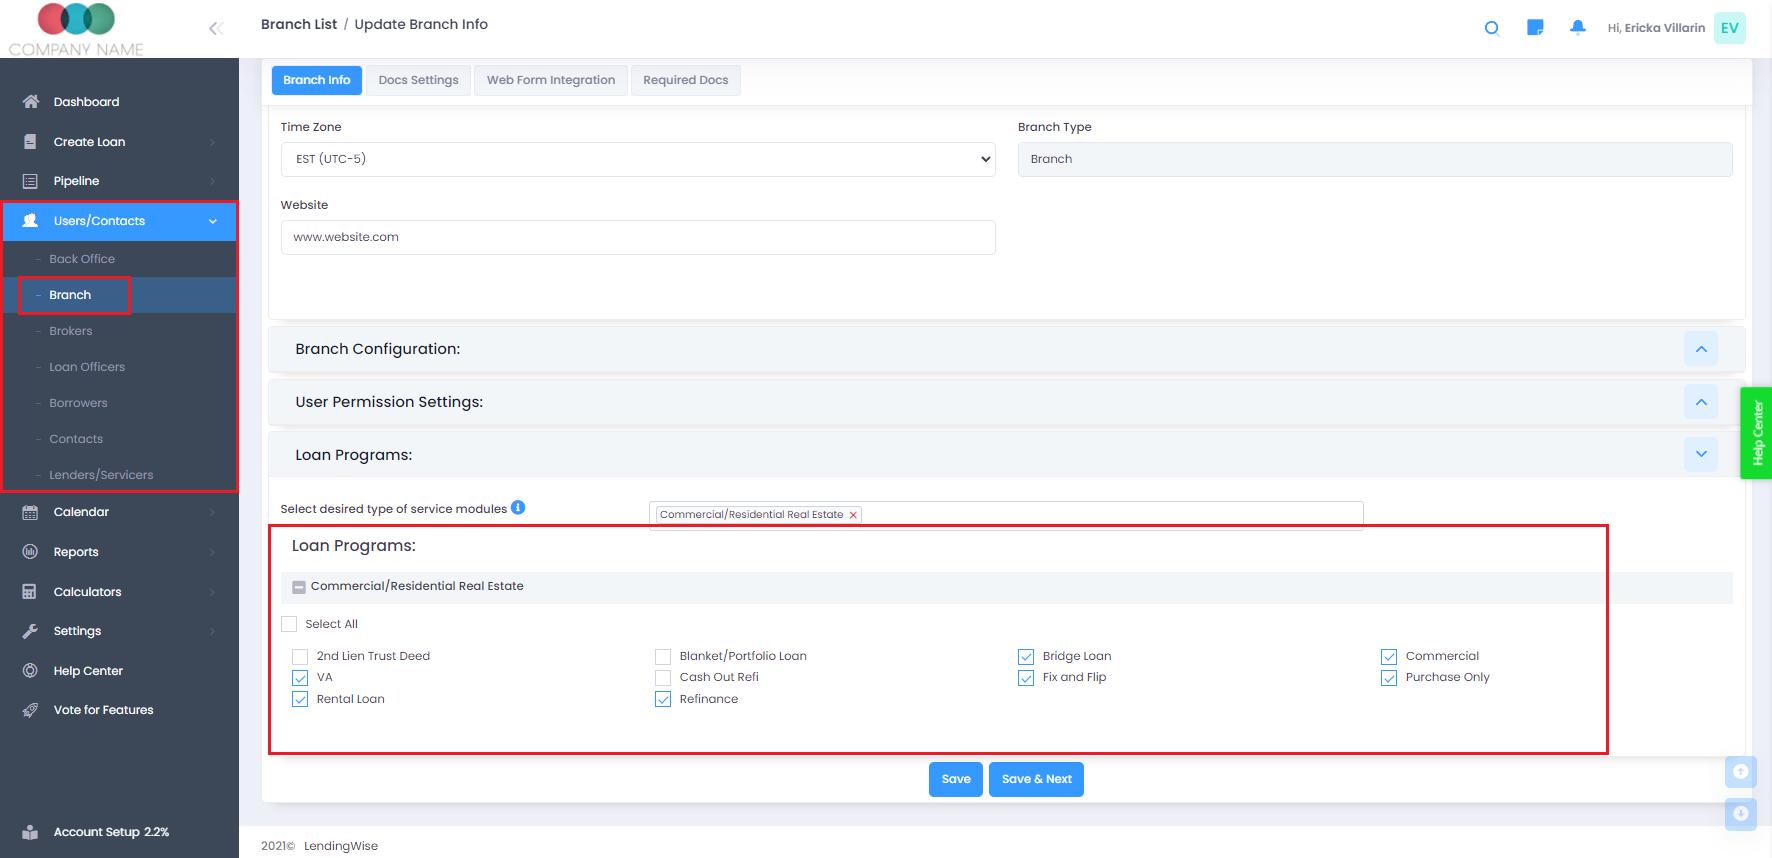
You must also turn the programs on for each branch: go to CRM > Branch > Branch List, click the branch, tick the programs under Loan Programs on the Branch Info tab, and save. Only standard programs are listed there. For internal programs, turn on "Allow access to Internal Loan Program?" on the branch instead.
Careful: renaming a program changes its name on existing files, and unticking a program hides it on files that already use it, with no warning.
Tip: loan programs tend to overlap with the Transaction Type (loan purpose) field. We recommend not creating programs like "Purchase Only" or "Cash Refi", since Transaction Type already covers that.
Tip: Custom Loan Guidelines control which values the webform offers based on transaction type, loan program, property type, property state, loan terms, credit score range and more.
Internal loan programs (investor overlays)
You can flag a program as Internal to manage your back-end capital sources or investors, often called investor overlays. Internal programs show to back office employees, and to any branch, broker or loan officer with "Allow access to Internal Loan Program?" turned on (including in Lender Marketplace results). You can give internal programs their own Quick App and Full App fields, workflow steps and required docs.
For example, say you offer a popular program with several investors behind it, each with its own guidelines, required fields or documents. Once you know which investor to use, pick that internal program on the loan file, and its extra fields, workflow steps, required docs and guideline warnings are added on top of your base settings.
Create an internal program
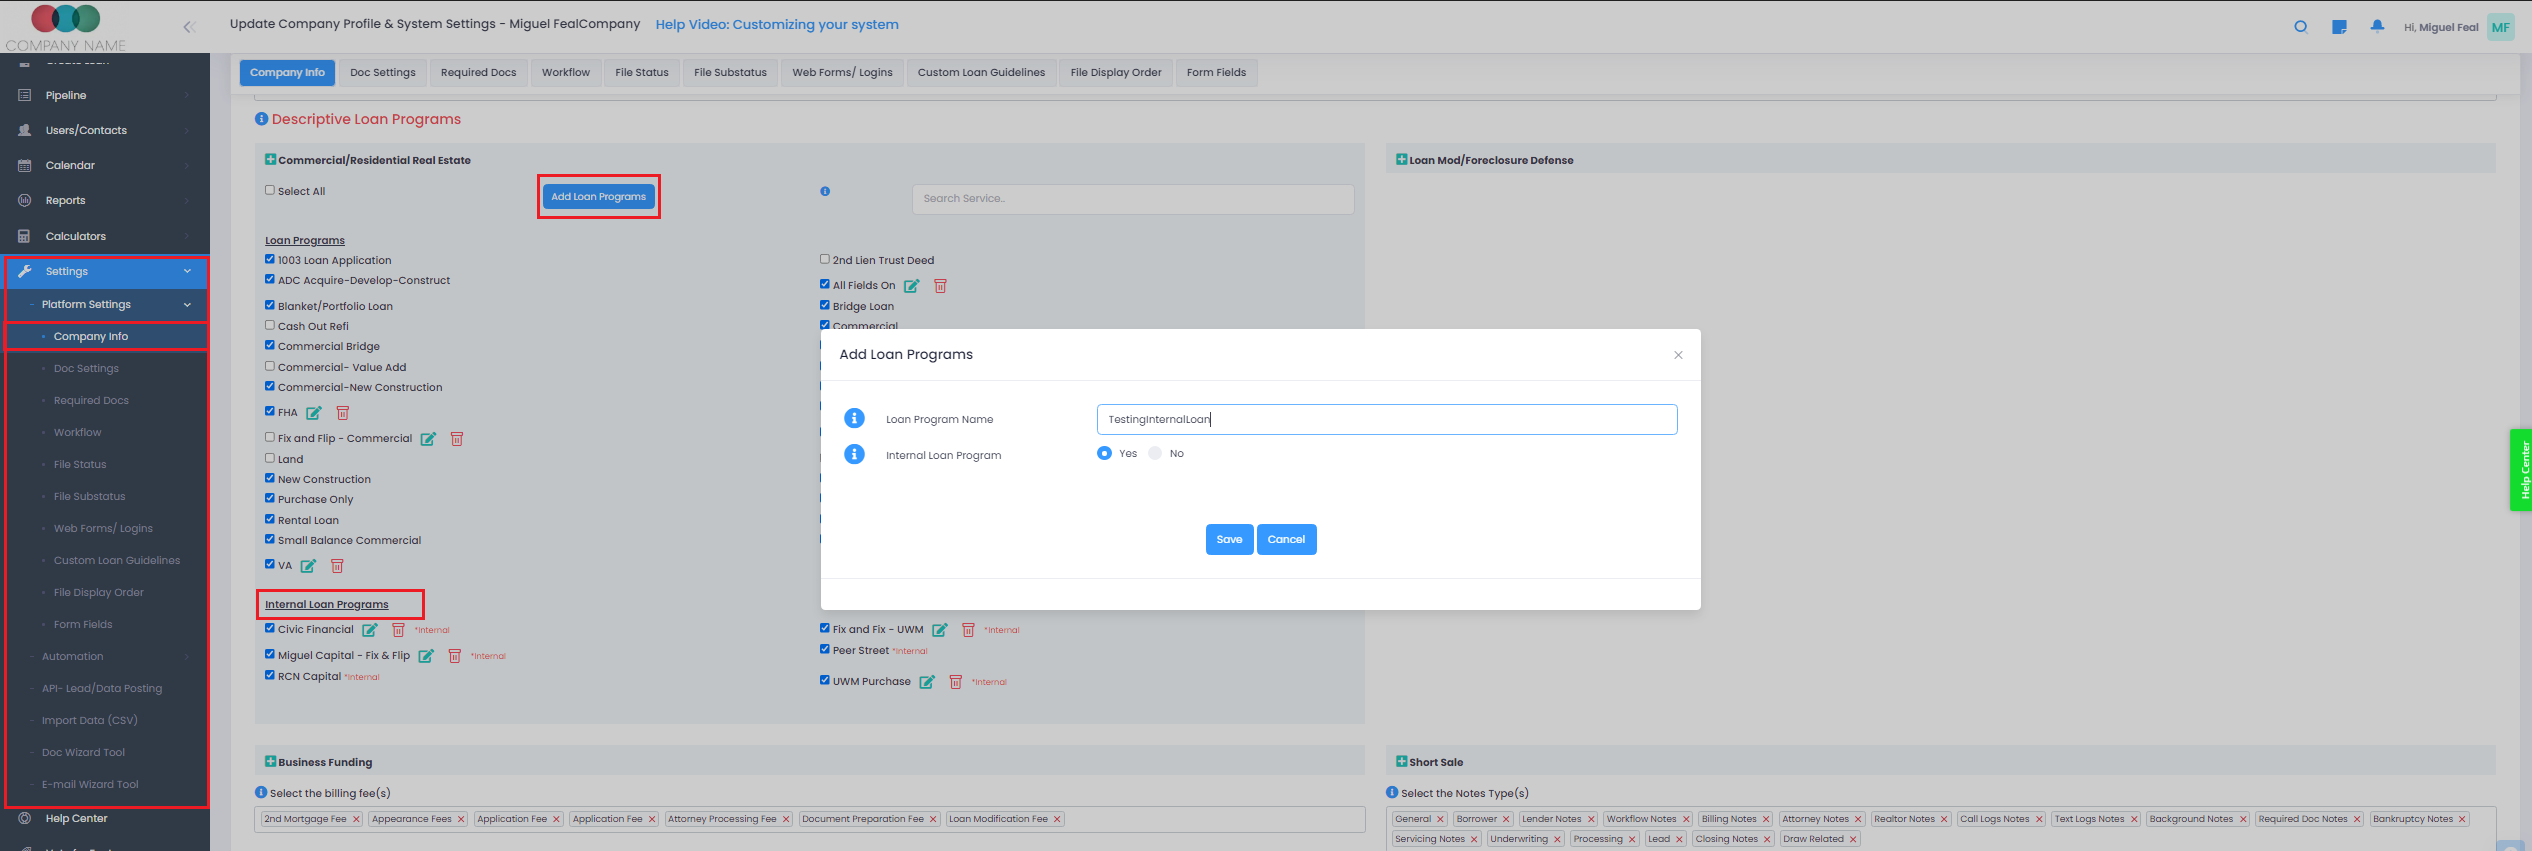
- Go to Settings > Platform Settings > Company Info, open Enable Loan Programs and click the green + beside the file type.
- Click Add Loan Programs, enter the name and set Internal Loan Program to Yes.
- Save the page.
To use it on a file, pick it in Select Internal Loan Program in Admin Info at the top of Quick App or Full App. Guideline warnings only apply if a Custom Loan Guideline exists for that program.
Can't see a loan program?
It's usually either not turned on for the company or not turned on for your branch. You need a Manager role to change this.
- In Settings > Platform Settings > Company Info > Enable Loan Programs, click the green + beside the file type. Ticked programs are on. Tick the ones you need and click the page's Save.
- In CRM > Branch > Branch List, click your branch and check Loan Programs on the Branch Info tab. Tick every program that should show on the application and click Save.
- For internal programs, turn on "Allow access to Internal Loan Program?" on the branch.
- In Settings > Platform Settings > Form Fields, QA Unique Loan Programs and FA Unique Loan Programs can limit which programs a field applies to on the Quick App or Full App.
Questions? Email helpdesk@lendingwise.com.