Workflow automation is a powerful feature that can save time and improve your workflow efficiency. LendingWise's Workflow Automation feature allows you to automate actions such as emails, tasks, and webhooks based on a workflow step's completion status (or checkmark). In this article, we will guide you on how to use this feature and provide examples of how it can streamline your workflow.
Example Use Case
Imagine sending an email ordering an appraisal from the appraisal rep attached to a specific loan file when you mark a check box on your workflow step called "Order Appraisal." You can achieve this with LendingWise Workflow Automation. First, create the necessary action, which, in this case, is an email, then create the rule that will trigger the automation action when you hit the check box on your Order Appraisal workflow step.
Creating an Automation Action
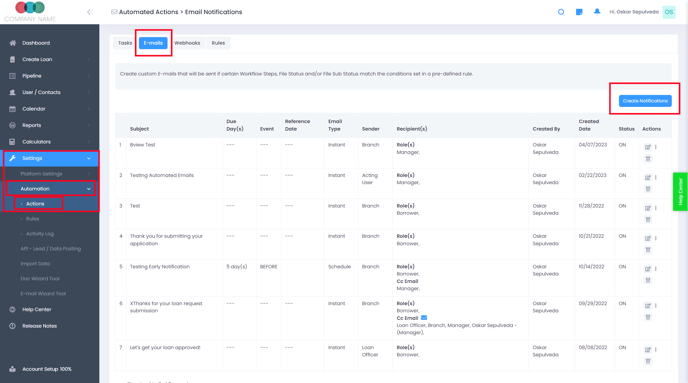
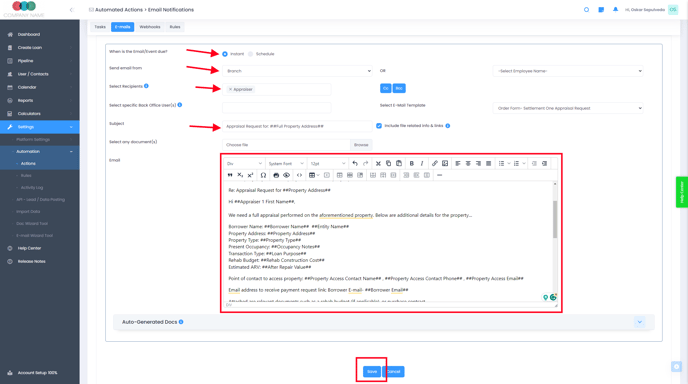
The first step in using Workflow Automation is to create an action. You can access this feature by navigating to the Automation > Actions tab and selecting the action type (Tasks, Emails, or Webhooks) from the tabs. For this example, we'll select Email, then click "Create Notifications" on the right side of the screen. Choose the details for the email, including the recipient, who the email will be coming from, the subject line, and the body of the email. If necessary, you can add dynamic information about the loan, borrower, property, and more to the email body. Once you're done, click Save.
Creating the Automation Trigger Rule
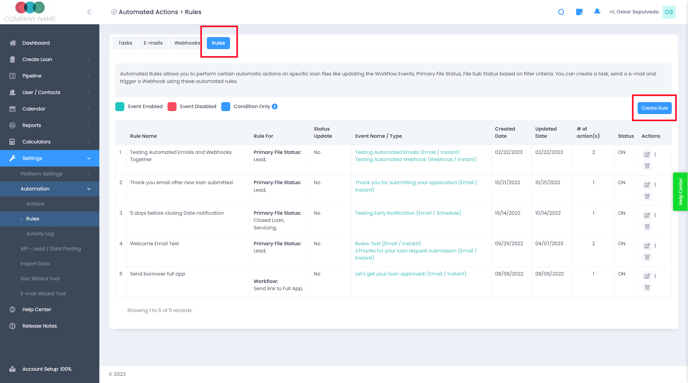
After creating your automation action, it's time to create the rule that will trigger the automation. Proceed to the "Rules" tab and click "Create Rule" on the right-hand side of the screen. Give your rule a descriptive name that reflects what it will do, such as "Request Appraisal Email" in this case. You also need to select the loan file type/module that this rule will apply to. In the "Rule Triggered When" section, select "Workflow" and then choose the workflow step called "Order Appraisal" from the drop-down options in the field to the right. Finally, click "Done" to proceed.

Attaching the Action to the Trigger Rule
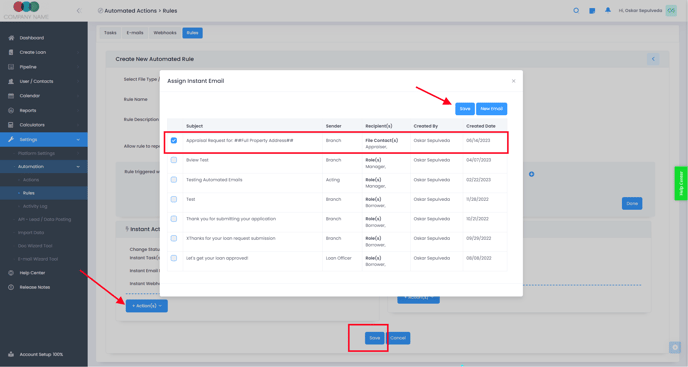
After creating the rule, attach the corresponding action to it. Look at the "Instant Action" and "Scheduled Actions" sections that appear toward the bottom. Click on the blue "+ Action(s)" button under "Instant Actions" if you want to set an instant email notification, then select "Email Notification" from the drop-down list. Choose the "Appraisal Request" email you had created previously by checking the box next to it before clicking "Save" to confirm. Now click the final "Save" button at the bottom of the screen to save the rule and action you have created. You should see a green alert that says “Automated Rule Added Successfully” to confirm that you have created your workflow automation successfully.
Workflow Automation in LendingWise is an essential feature that can help you automate many actions within your workflow process. By automating tasks like emails, tasks, and webhooks that get triggered when certain workflow steps are checkmarked, you can improve your workflow efficiency and save time. If you need assistance with the automation engine, please contact our support team at helpdesk@lendingwise.com and they will be happy to guide you.
.