LendingWise is a powerful lending platform designed to make working with 3rd party services from Credit Reporting Agencies (CRAs) such as running credit, Flood Cert, and more, as seamless as possible. This article will guide you through the process of integrating these services with your LendingWise account.
Step 1: Choose Your CRA and Enable Service Integrations
LendingWise works with over 20 integrated CRAs via the MeridianLink, Inc. system, including well-known names like Advantage Credit Bureau, American Reporting Company, and Credit Information Systems (a full list of supported CRAs can be found at the end of this article). Before ordering any services, ensure that your chosen CRA provider has enabled integration with LendingWise in their system and is part of the MeridianLink network. You will also need to obtain login credentials from your CRA provider.
Step 2: Configure 3rd Party Services and enter Login Credentials
LendingWise allows you to add one CRA to your account. To do so, submit a ticket through the link provided: Submit a Ticket
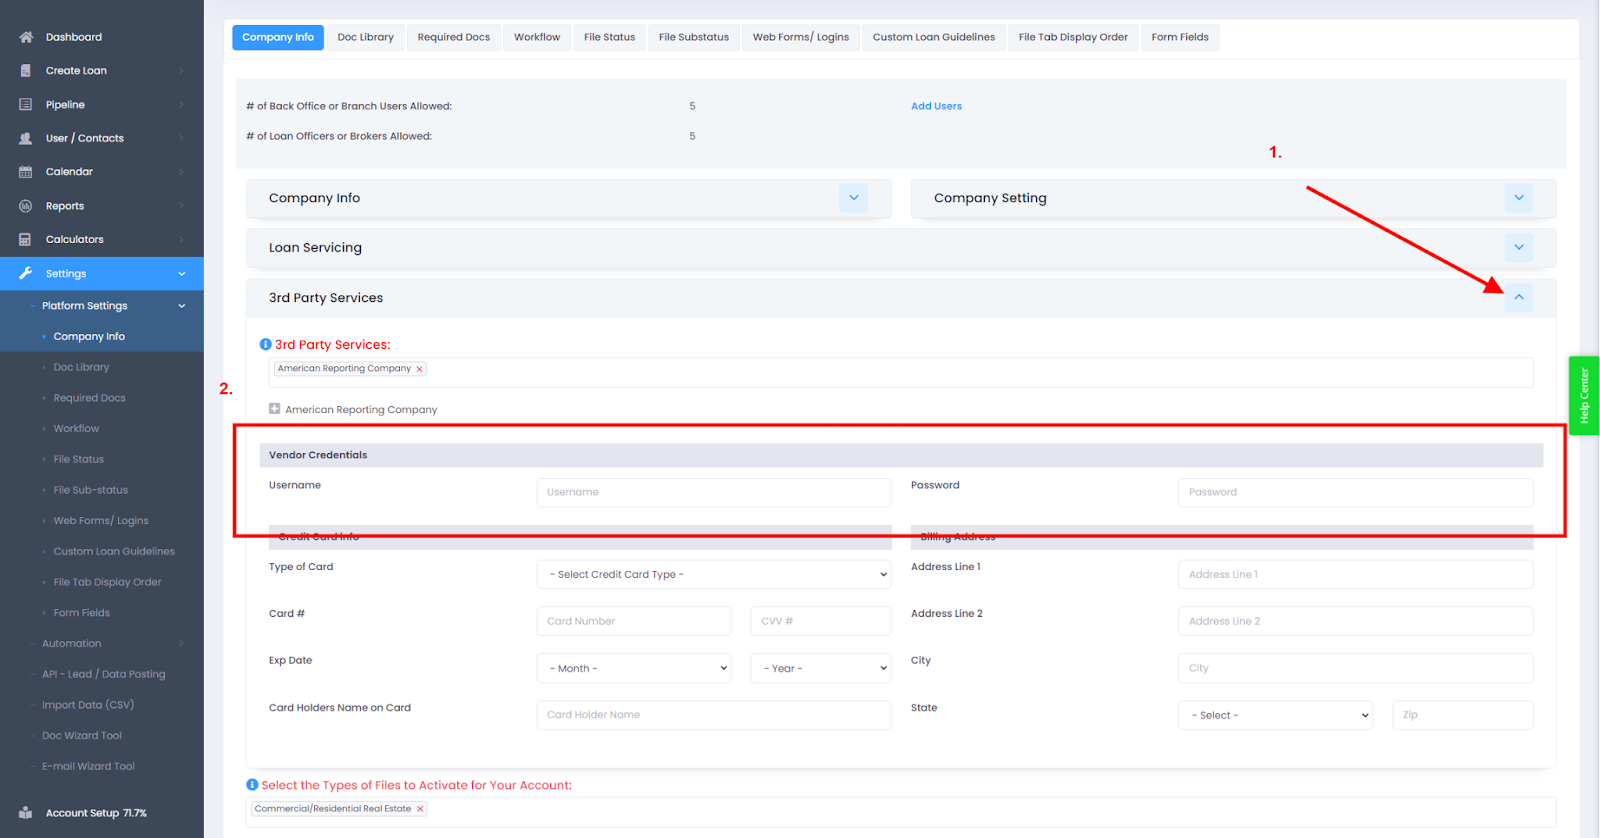
Once your chosen CRA is added to your account, enter the login credentials provided by your CRA vendor in the 3rd Party Services settings. Go to Settings > Platform Settings > Company Info > Click on the drop-down section for "3rd Party Services." Type in the username and password provided by your chosen CRA in the appropriate fields, then click the blue "Save" button toward the bottom of the screen. If necessary, you can also add credentials for your loan officers, brokers, and branches in their respective personal settings.
Step 3: Enable 3rd Party Service Access for Branches and Users
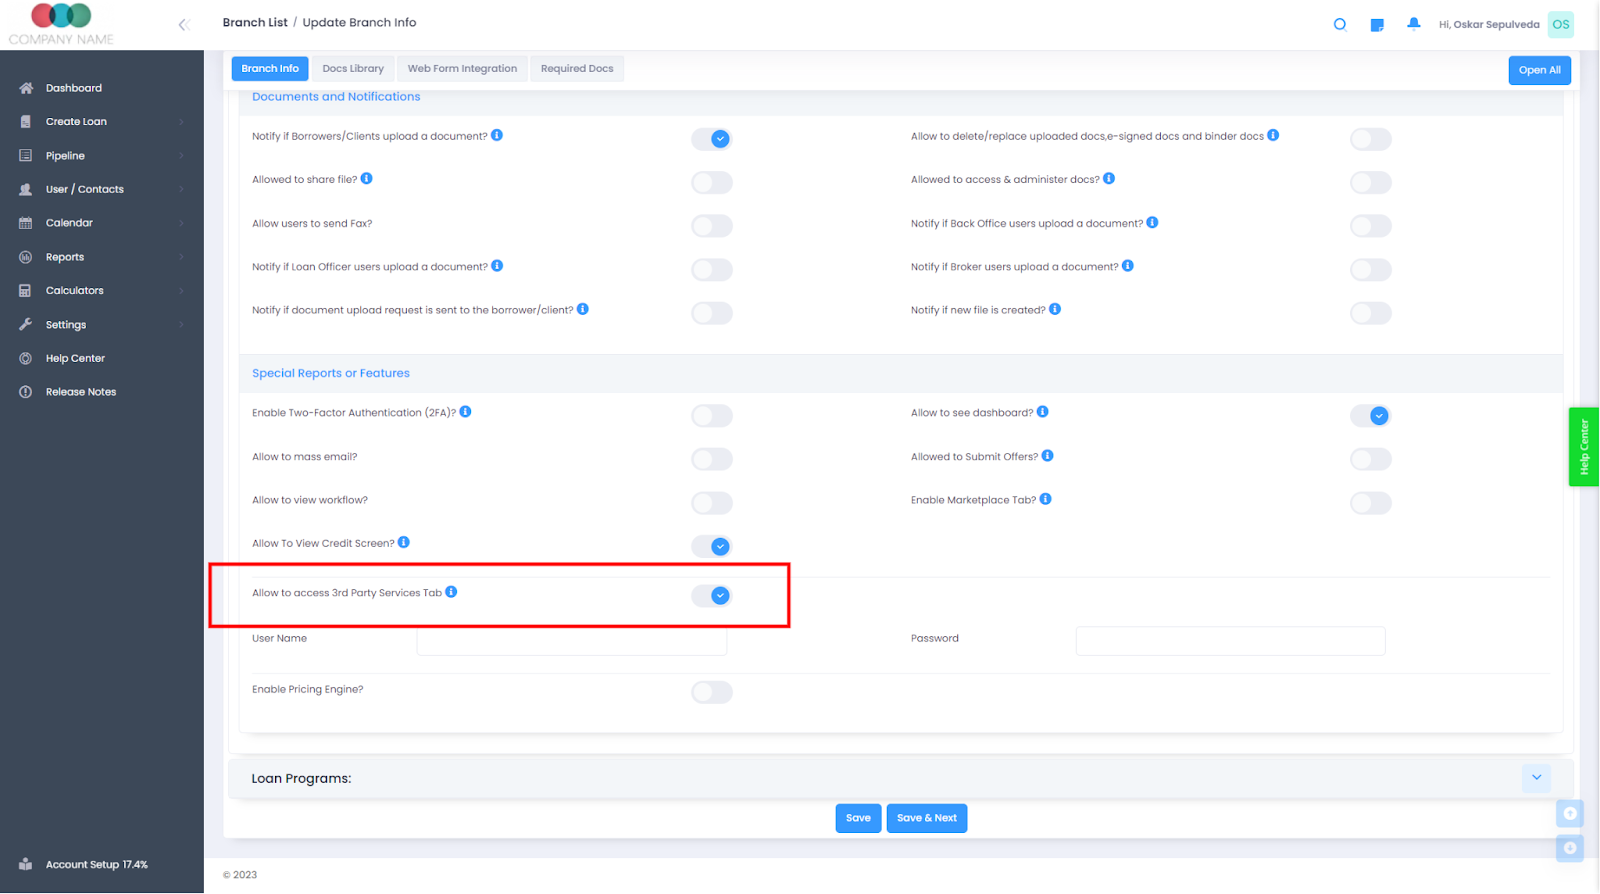
Now open up your branch settings and scroll down to the permissions at the bottom. Toggle "Allow to access 3rd Party Services Tab" to the "On" position, and then click the blue "Save" button.
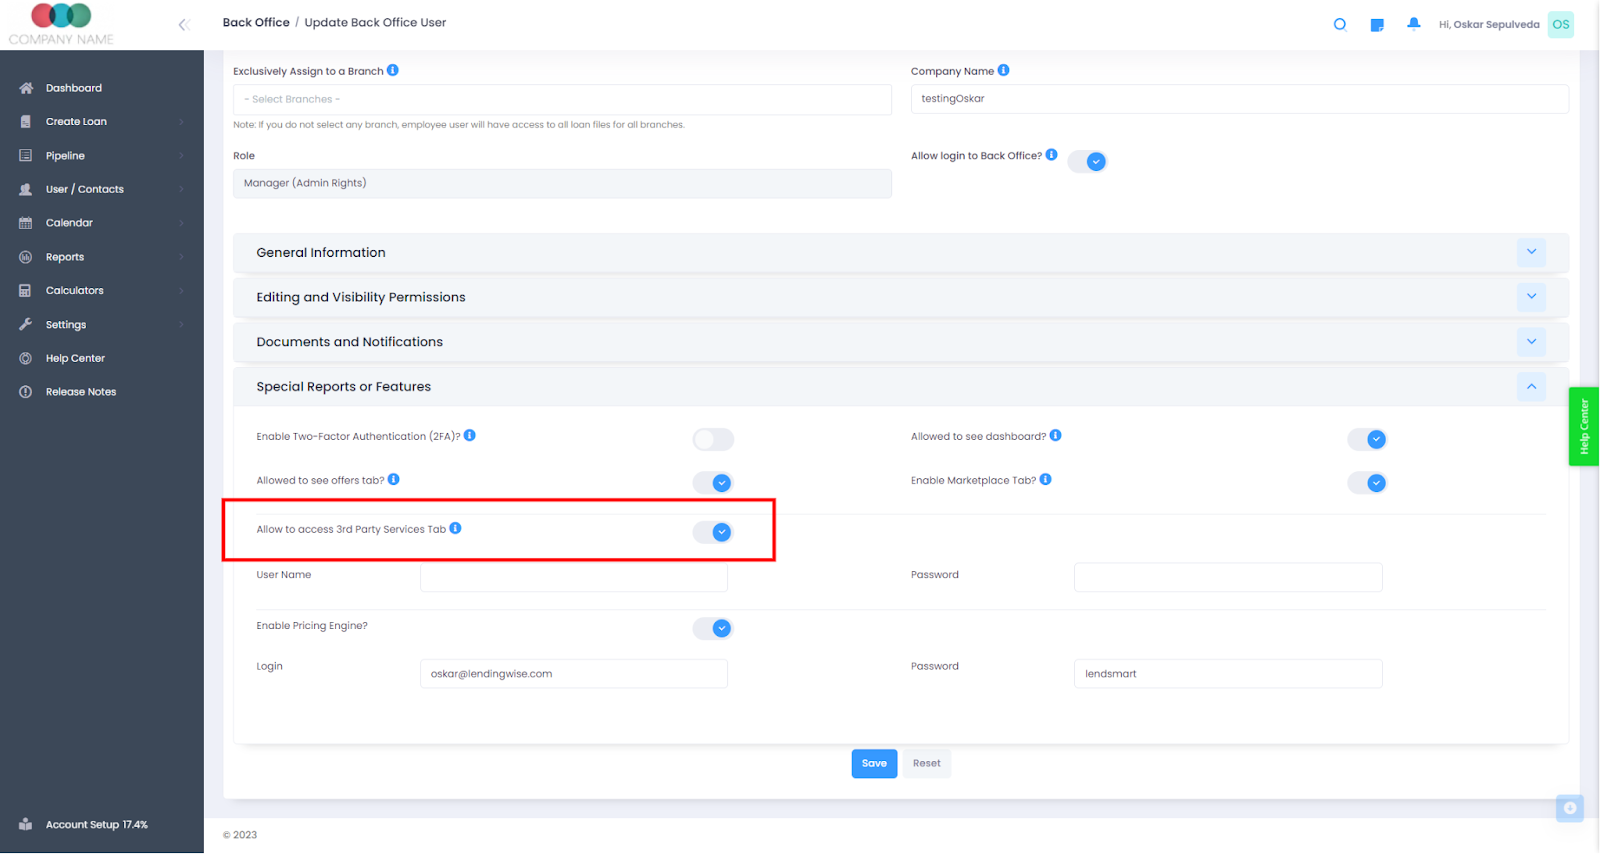
Next, open up the user profile for each user who needs access to the 3rd party services. Scroll down to the permissions section and toggle "Allow to access 3rd Party Services Tab" to the "On" position. Be sure to do this for all users who will be running a credit check or need access to the 3rd party services.
Step 4: Ordering Services through LendingWise
With the integration configured and the proper permissions set, you can now run credit checks and order additional services from inside the loan file. Simply navigate to the 3rd Party Services tab within the loan file to access and utilize these integrated services.
Please see the following step-by-step walkthrough to order 3rd party services.
How to Order Credit Report
How to Order Business Credit
Services Offered by the Credit Bureaus:
Services Offered with your credit provider:
Consumer Credit Report
Co-Borrower Credit Report
Joint Credit Report - Borrower and Co-Borrower
Business Credit Report
AVM
Flood
MERS
Criminal Record Report
Supported CRA List (via MeridianLink):
-
Advantage Credit
-
Advantage Plus Credit
-
Alliance 2020
-
American Reporting Company
-
Birchwood Credit Services
-
CBFS Business Solutions
-
Certified Credit Reporting
-
CIS Information Systems
-
CISCO Credit
-
Credit Bureau Services
-
Credit Link
-
Credit Plus
-
Credit Technologies
-
Credit Technology (Possible duplicate of Credit Technologies — needs verification)
-
Demo CRA
-
ISCKCB Credit
-
KCB Credit (Possibly same as ISCKCB Credit — needs clarification)
-
Merchants Credit Bureau
-
Merchants Credit Bureau (Savannah) (Likely same organization, different location)
-
Premium Credit Bureau
-
Premium Credit Bureau Data (Possibly the same as Premium Credit Bureau)
-
Sarma
-
Service 1st
-
SettlementOne Credit Corp
-
Strategic Information Resources
-
TheCreditBureau.com
-
United One Resources
-
Universal Credit Services
6/2025
Please note we have successfully integrated with Xactus! Please see this link.